Web Installer Wizard
MailTrixy includes a built-in web installer that guides you through the entire setup process from your browser. No command-line access is required for the core installation.
Recommended: The web installer is the easiest and fastest way to set up MailTrixy. No coding or terminal commands required — everything is done from your browser.
Before You Begin
You only need two things before launching the installer:
- Upload files: Extract the downloaded MailTrixy.zip and upload all files to your hosting root directory (e.g.,
public_html) using your hosting File Manager or FTP client. - Create a database: In your hosting control panel (cPanel / hPanel / phpMyAdmin), create a new MySQL database. Note down the database name, username, and password — you will need these in Step 3.
Once the files are uploaded and the database is created, simply visit your domain in the browser and the installer will launch automatically.
Note: All PHP dependencies and frontend assets are pre-built and included in the download package. You do not need to run any terminal commands.
How It Works
When MailTrixy detects a fresh deployment (no storage/installed file), visiting any URL automatically redirects to /install. The wizard walks you through 6 steps:
- Welcome - Introduction and overview
- Server Requirements - Automatic PHP version, extension, and directory permission checks
- Database Configuration - Enter your database credentials with a live connection test
- Application Settings - Set your app name, URL, and purchase code
- Admin Account - Create your administrator account
- Installation - Automated migration, seeding, and configuration
After installation completes, you are redirected to a success page with a link to your admin panel.
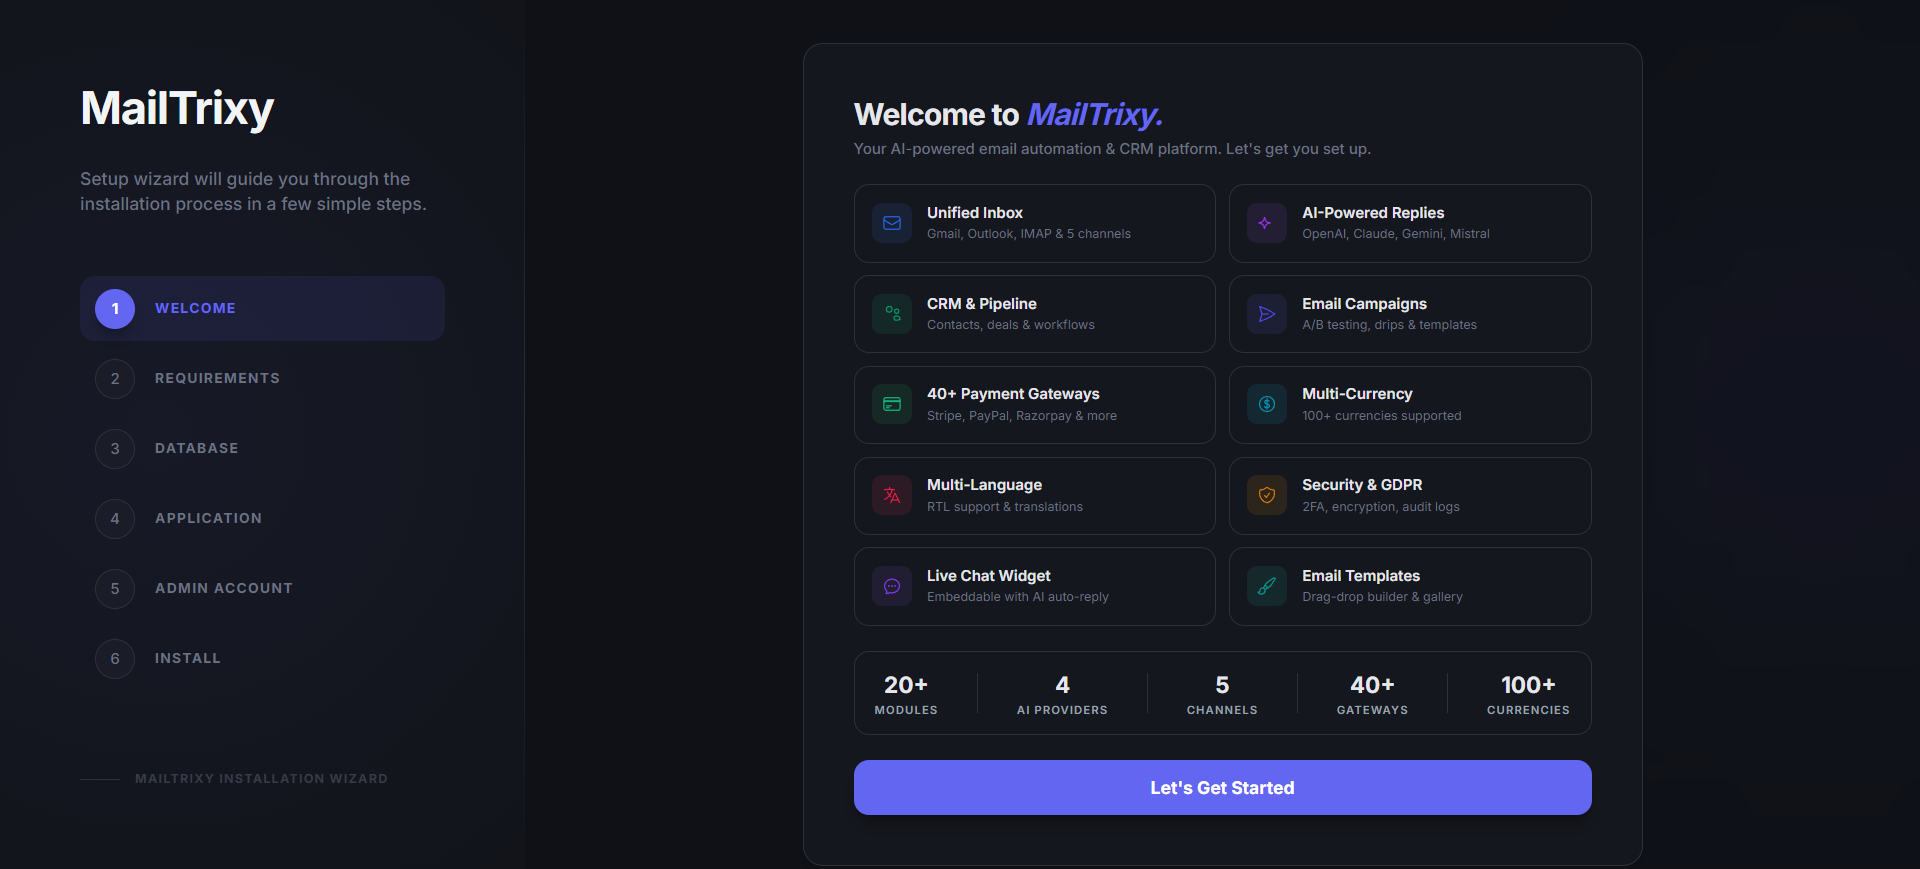
Step 1: Welcome
The welcome page introduces the installer and displays key features that will be configured. Click "Begin Installation" to start.
Step 2: Server Requirements
The installer automatically checks your server environment:
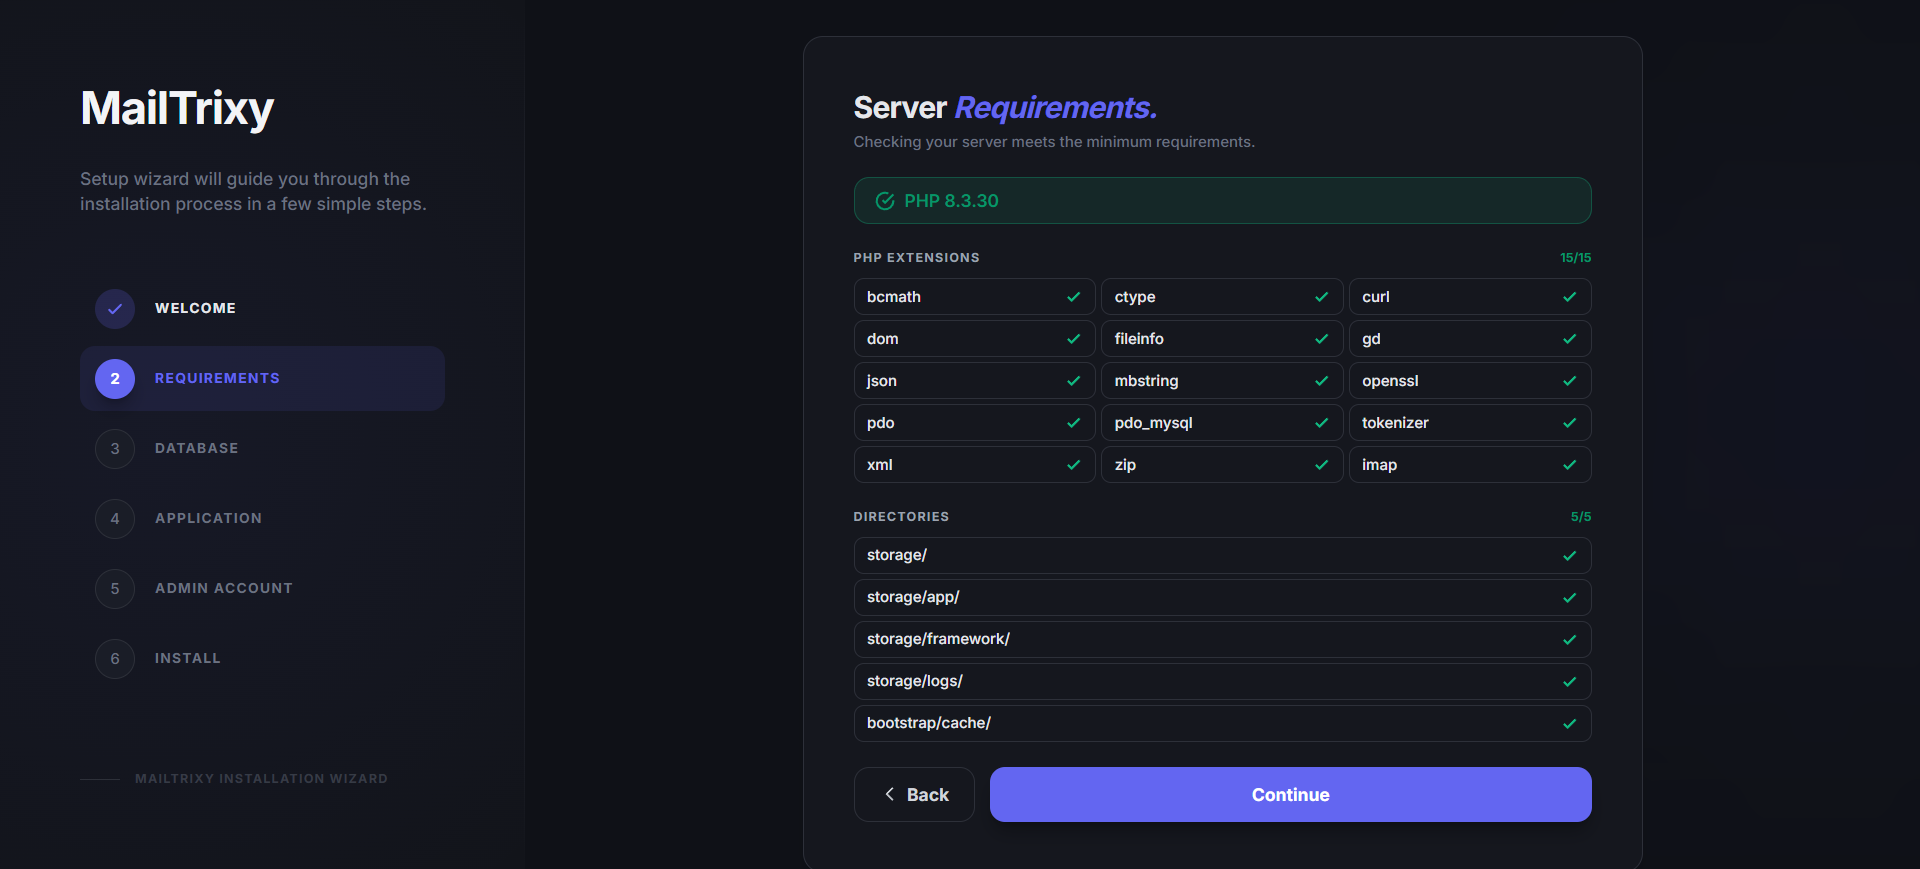
PHP Version
- Requires PHP 8.2 or higher
Required PHP Extensions
All 13 extensions are checked automatically:
- BCMath, Ctype, cURL, DOM, Fileinfo, GD, JSON, Mbstring, OpenSSL, PDO, Tokenizer, XML, Zip
Directory Permissions
The following directories must be writable:
storage/storage/app/storage/framework/bootstrap/cache/
PDO Database Driver
The MySQL PDO driver must be available.
Note: The "Continue" button is disabled until all requirements pass. If any check fails, install the missing extension or fix the directory permissions and refresh the page.
Step 3: Database Configuration
Configure your database connection:
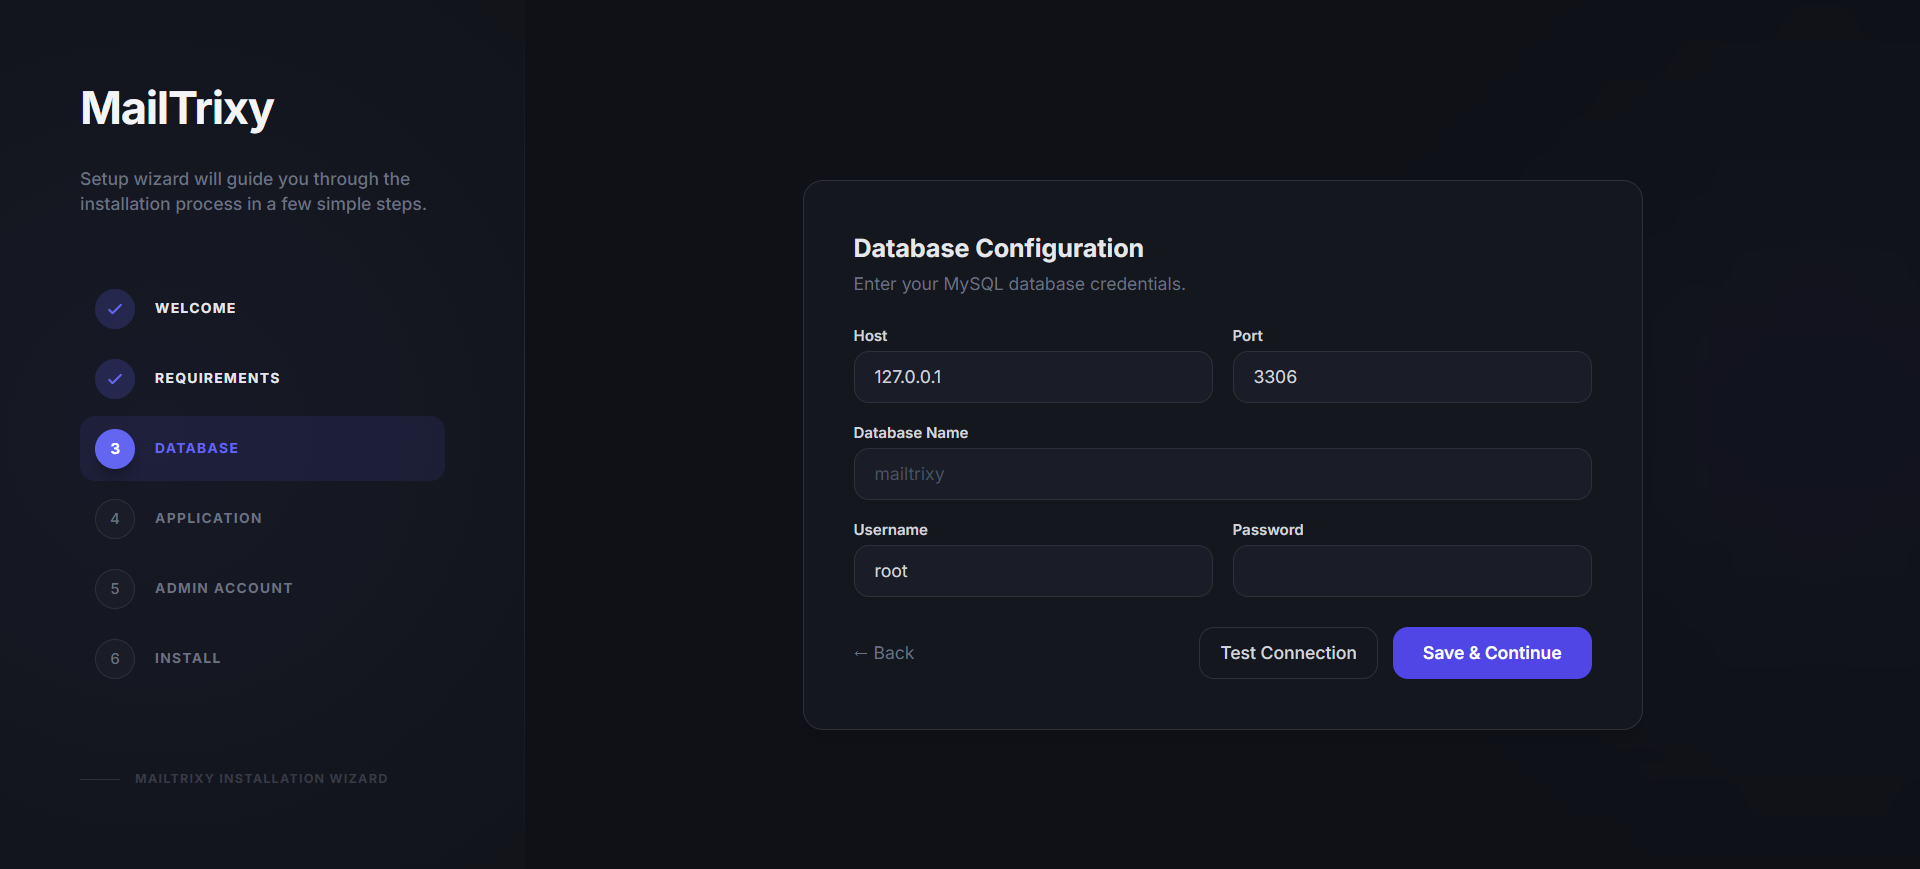
- Database Driver: MySQL (only supported driver)
- Host: Your database server address (default:
127.0.0.1) - Port: MySQL default port is
3306 - Database Name: The database to use (must already exist)
- Username & Password: Your database credentials
Test Connection
Click the "Test Connection" button to verify your credentials before proceeding. The installer uses a direct PDO connection test to ensure reliability. You will see a green success message or a red error with details if the connection fails.
Important: Create the MySQL database before running the installer. The installer does not create the database itself, only the tables within it.
Step 4: Application Settings
Configure your application:
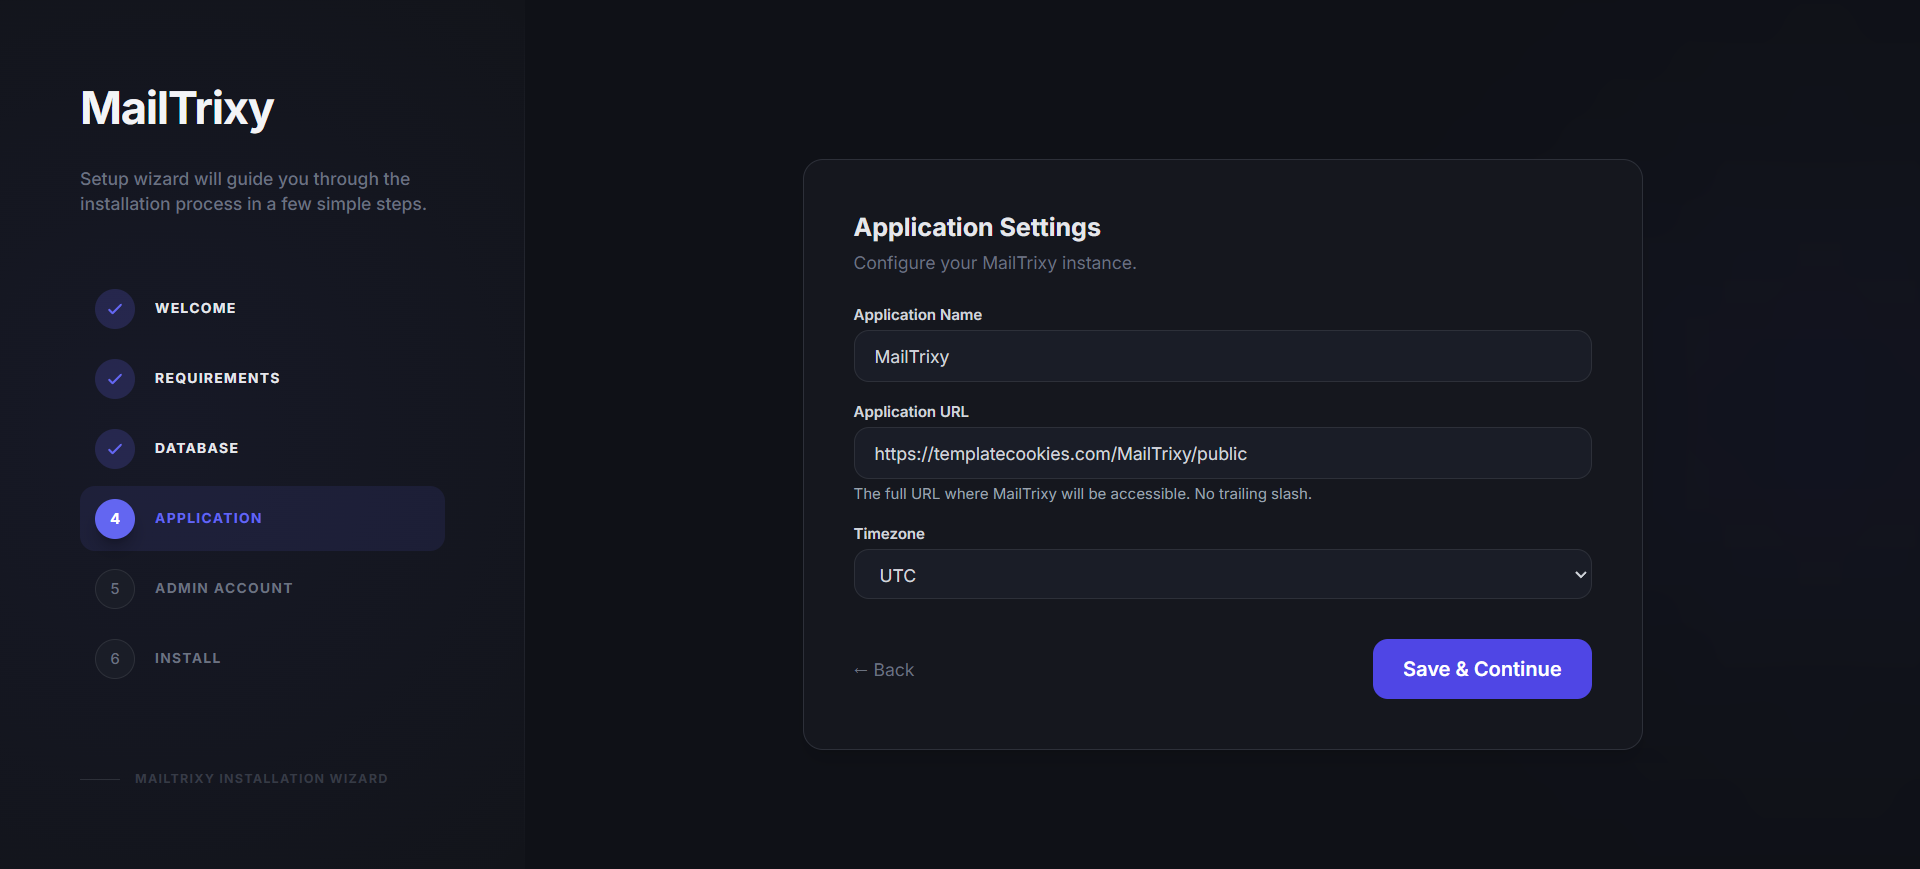
- Application Name: Your site name (default: "MailTrixy"). Used in headers, emails, and branding.
- Application URL: Your full domain URL (e.g.,
https://yourdomain.com). Auto-detected from the current browser URL. - Purchase Code: Your CodeCanyon purchase code for license verification.
Step 5: Admin Account
Create your administrator account:
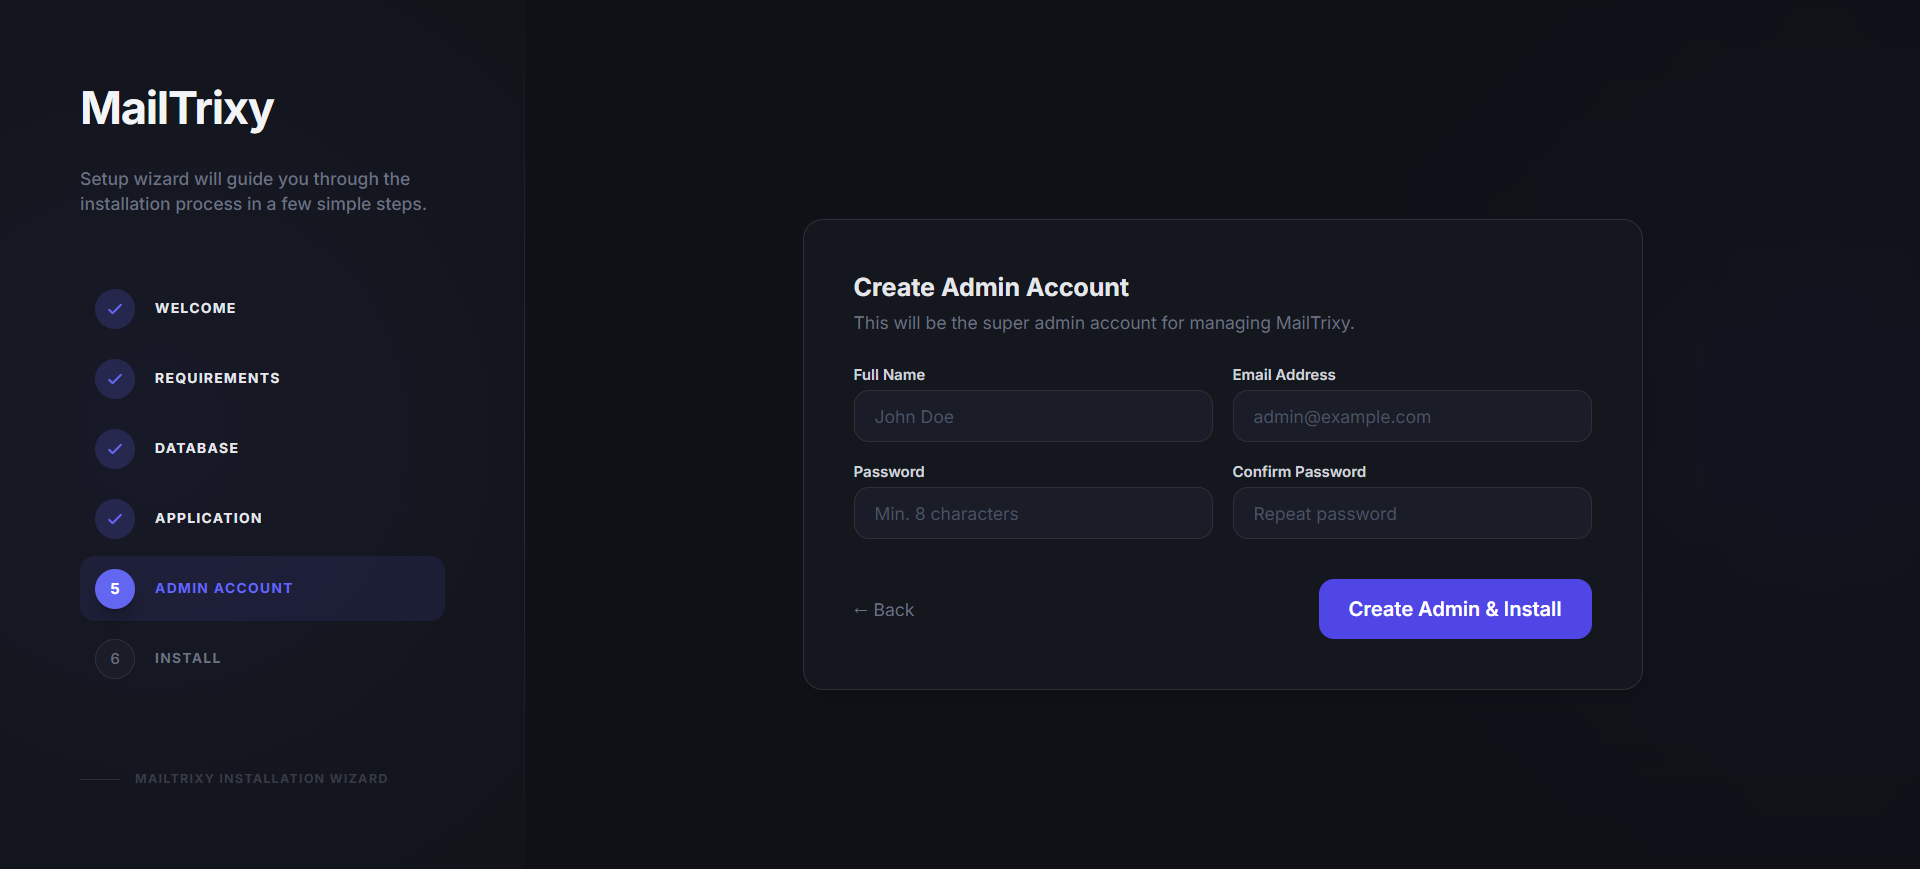
- Full Name: The admin display name
- Email Address: Used for login and notifications
- Password: Minimum 8 characters (confirmed with a second field)
This account will be assigned the Super Admin role with full access to all features and settings.
Step 6: Automated Installation
Click "Create Admin & Install" to begin the automated installation. The installer performs the following steps with a real-time progress display:
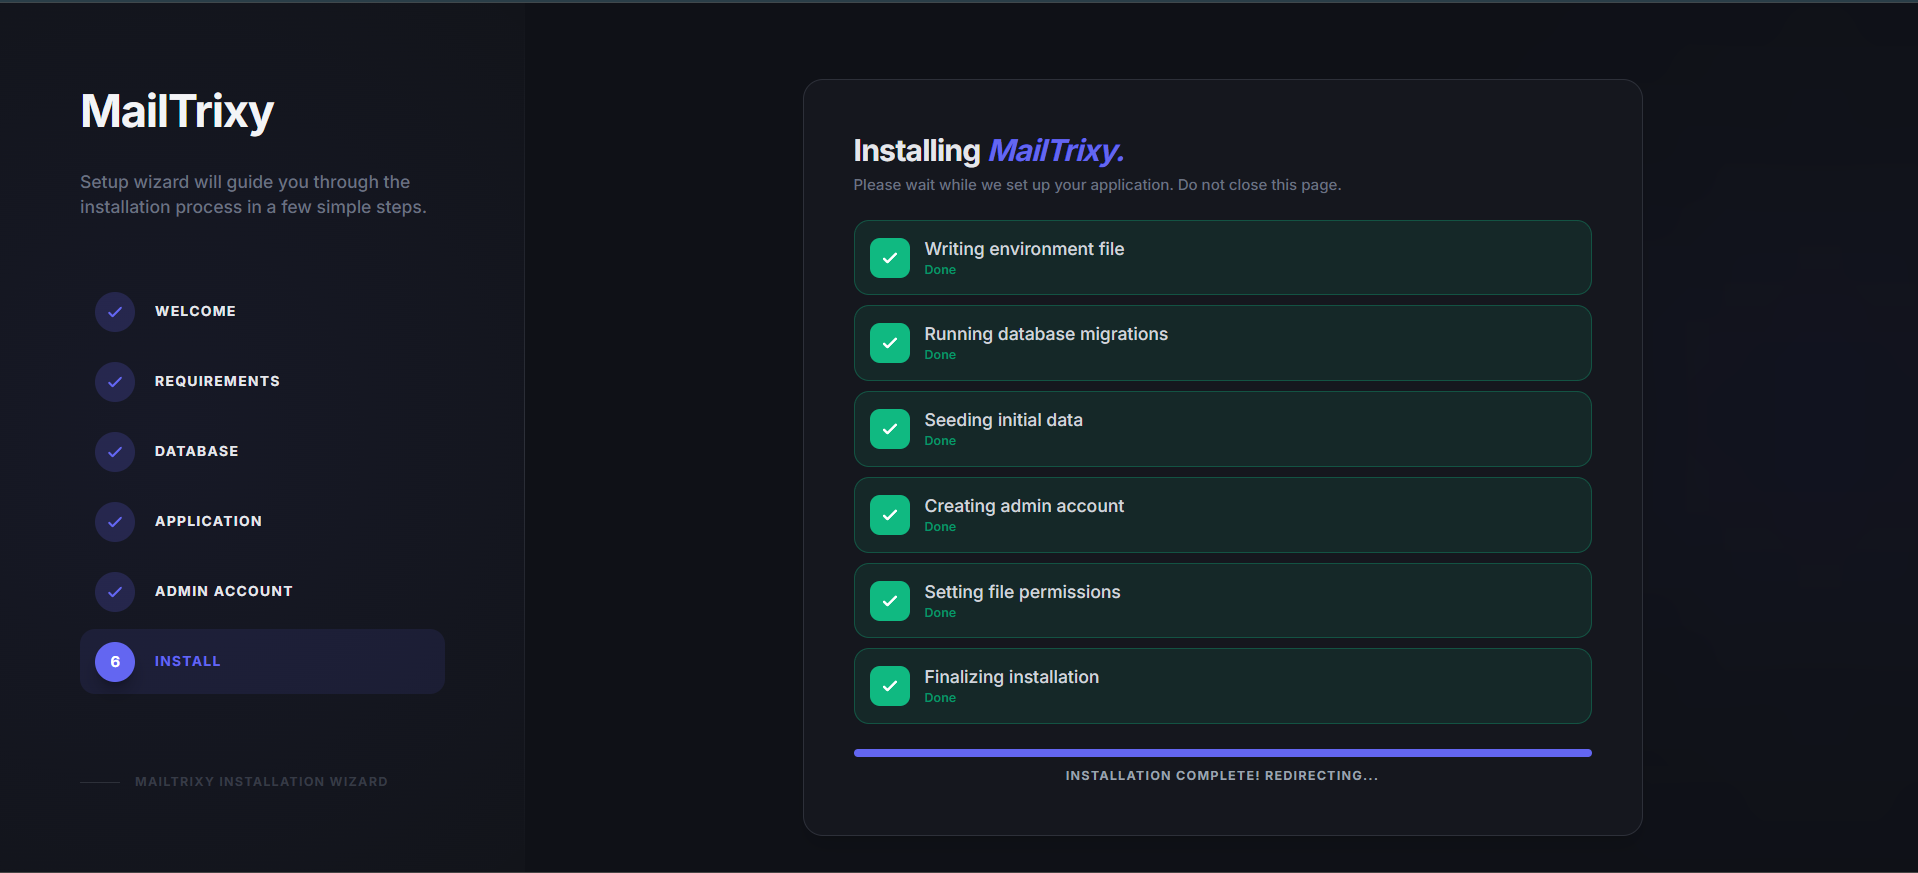
- Creating environment file - Generates the
.envfile with your configuration - Generating application key - Creates a secure APP_KEY for encryption
- Running database migrations - Creates all required database tables
- Seeding essential data - Populates default data (roles, permissions, default plans, currencies, payment gateways)
- Creating admin account - Sets up your Super Admin user
- Setting file permissions - Creates the storage symlink
- Finalizing installation - Clears caches and writes the install lock file
Note: Do not close or refresh the browser during installation. The process typically takes 10-30 seconds depending on your server.
Installation Complete
After successful installation, you will see a completion page with:
- Your admin panel URL
- The admin email you configured
- A link to go directly to the admin panel
- A link to visit the homepage
Security & Lock Mechanism
Once installation completes, a storage/installed lock file is created. This ensures:
- The installer is no longer accessible - visiting
/installredirects to the homepage - All application routes work normally
- The lock file has zero database dependency (pure file check)
Warning: Deleting the storage/installed file will re-enable the installer. Keep this file intact in production.
Back Navigation
Every step (except Welcome) includes a Back button. You can navigate backward at any time to review or change your settings before the final installation step. Session data is preserved when navigating between steps.
Troubleshooting
419 Page Expired Error
This should not occur with the web installer. If it does, ensure the storage/framework/sessions directory is writable.
Database Connection Failed
- Verify your database server is running
- Check that the database name exists (create it manually first)
- Ensure the username has proper privileges
- For remote databases, confirm the host allows connections from your server's IP
Installation Stuck or Failed
- Check
storage/logs/laravel.logfor detailed error messages - Ensure PHP has sufficient memory (at least 128MB recommended)
- The installer has a concurrency guard - if a previous attempt failed, wait 5 minutes or delete
storage/install.lockand retry
Re-running the Installer
If you need to start over:
- Delete
storage/installed - Drop all tables from the database (or use a fresh database)
- Visit your domain again to restart the wizard
Post-Installation Steps
After the web installer completes, you may want to configure these optional features:
- SMTP / Email: Configure mail settings in Admin Panel > System Settings > SMTP so order confirmations and password resets are delivered.
- Payment Gateways: Add API keys for your preferred payment providers in Admin Panel > Payment Gateways (Stripe, PayPal, Razorpay, etc.).
- Plans & Pricing: Customize subscription plans and pricing in Admin Panel > Plans.
- AI Providers: Add API keys for AI-powered features in Admin Panel > AI Configuration.
- Cron Job: Set up the cron job for background processing (see Queue & Cron Setup). On most shared hosting this is done from the control panel's "Cron Jobs" section.
- Branding: Update logo, favicon, and site name in Admin Panel > System Settings > General.